Introduction
It is inconceivable that there is lack of your favorite music when you are going for a drive. Go ahead to create music CD for yourself to make the trip more interesting. Free DVD-Video Burner is a versatile and easy to use little piece of software with built-in audio CD burner that allows you to intuitively create your own audio CDs from your audio collection without needing to decode your audio files first. Or you can put as many audio files as you can into a CD-R or DVD-R and take them with you anytime and anywhere! This tutorial will show you how to burn music CD to enjoy in your CD player.
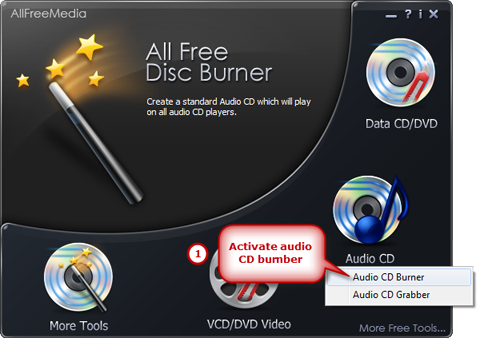
Step 1. Activate the Audio CD Burner
Insert a writable CD into your disc drive and launch Free DVD-Video Burner. Click “Audio CD” and choose “Audio CD Burner” to activate the audio burner wizard.

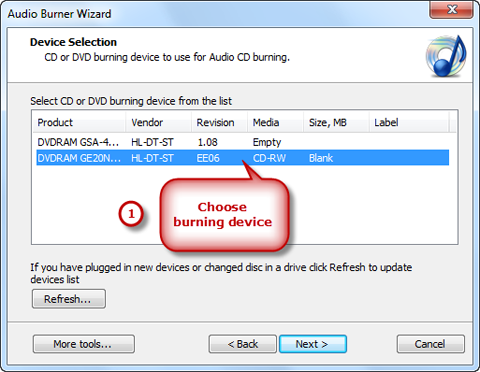
Step 2. Choose Burning Device
The burner automatically scans your system and all the available drives are displayed in the list. You should select one usable disc drive from the list. Click “Refresh” to update the device list if you plug in new devices or change the disc in the drive.

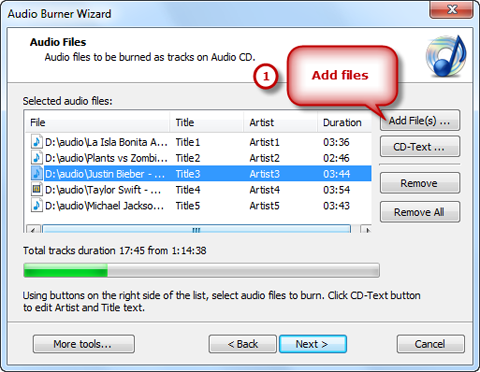
Step 3. Add Files
Click “Add File(s)…” to import as many audio files as you want to the burning list. Hit “Remove” to delete some unwanted files while “Remove All” button helps you delete all of them. You can use CD-Text to edit title or artist for these files.

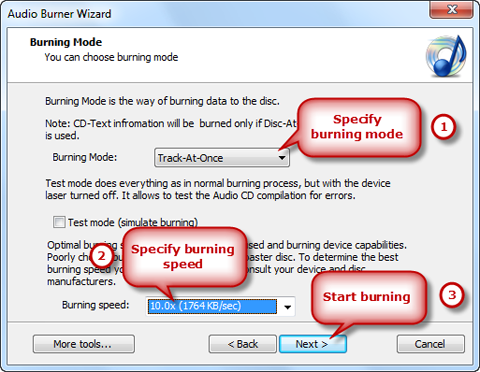
Step 4. Choose Burning Mode/Speed & Burn
Select one burning mode from “Burning Mode” drop-down list. You may choose test mode to simulate burning for checking errors. Then, choose the appropriate burning speed (Burning speed depends on the capabilities of your system and your drive). Click “Next” to start burning. The disc will eject after the music CD has been completely burned.

